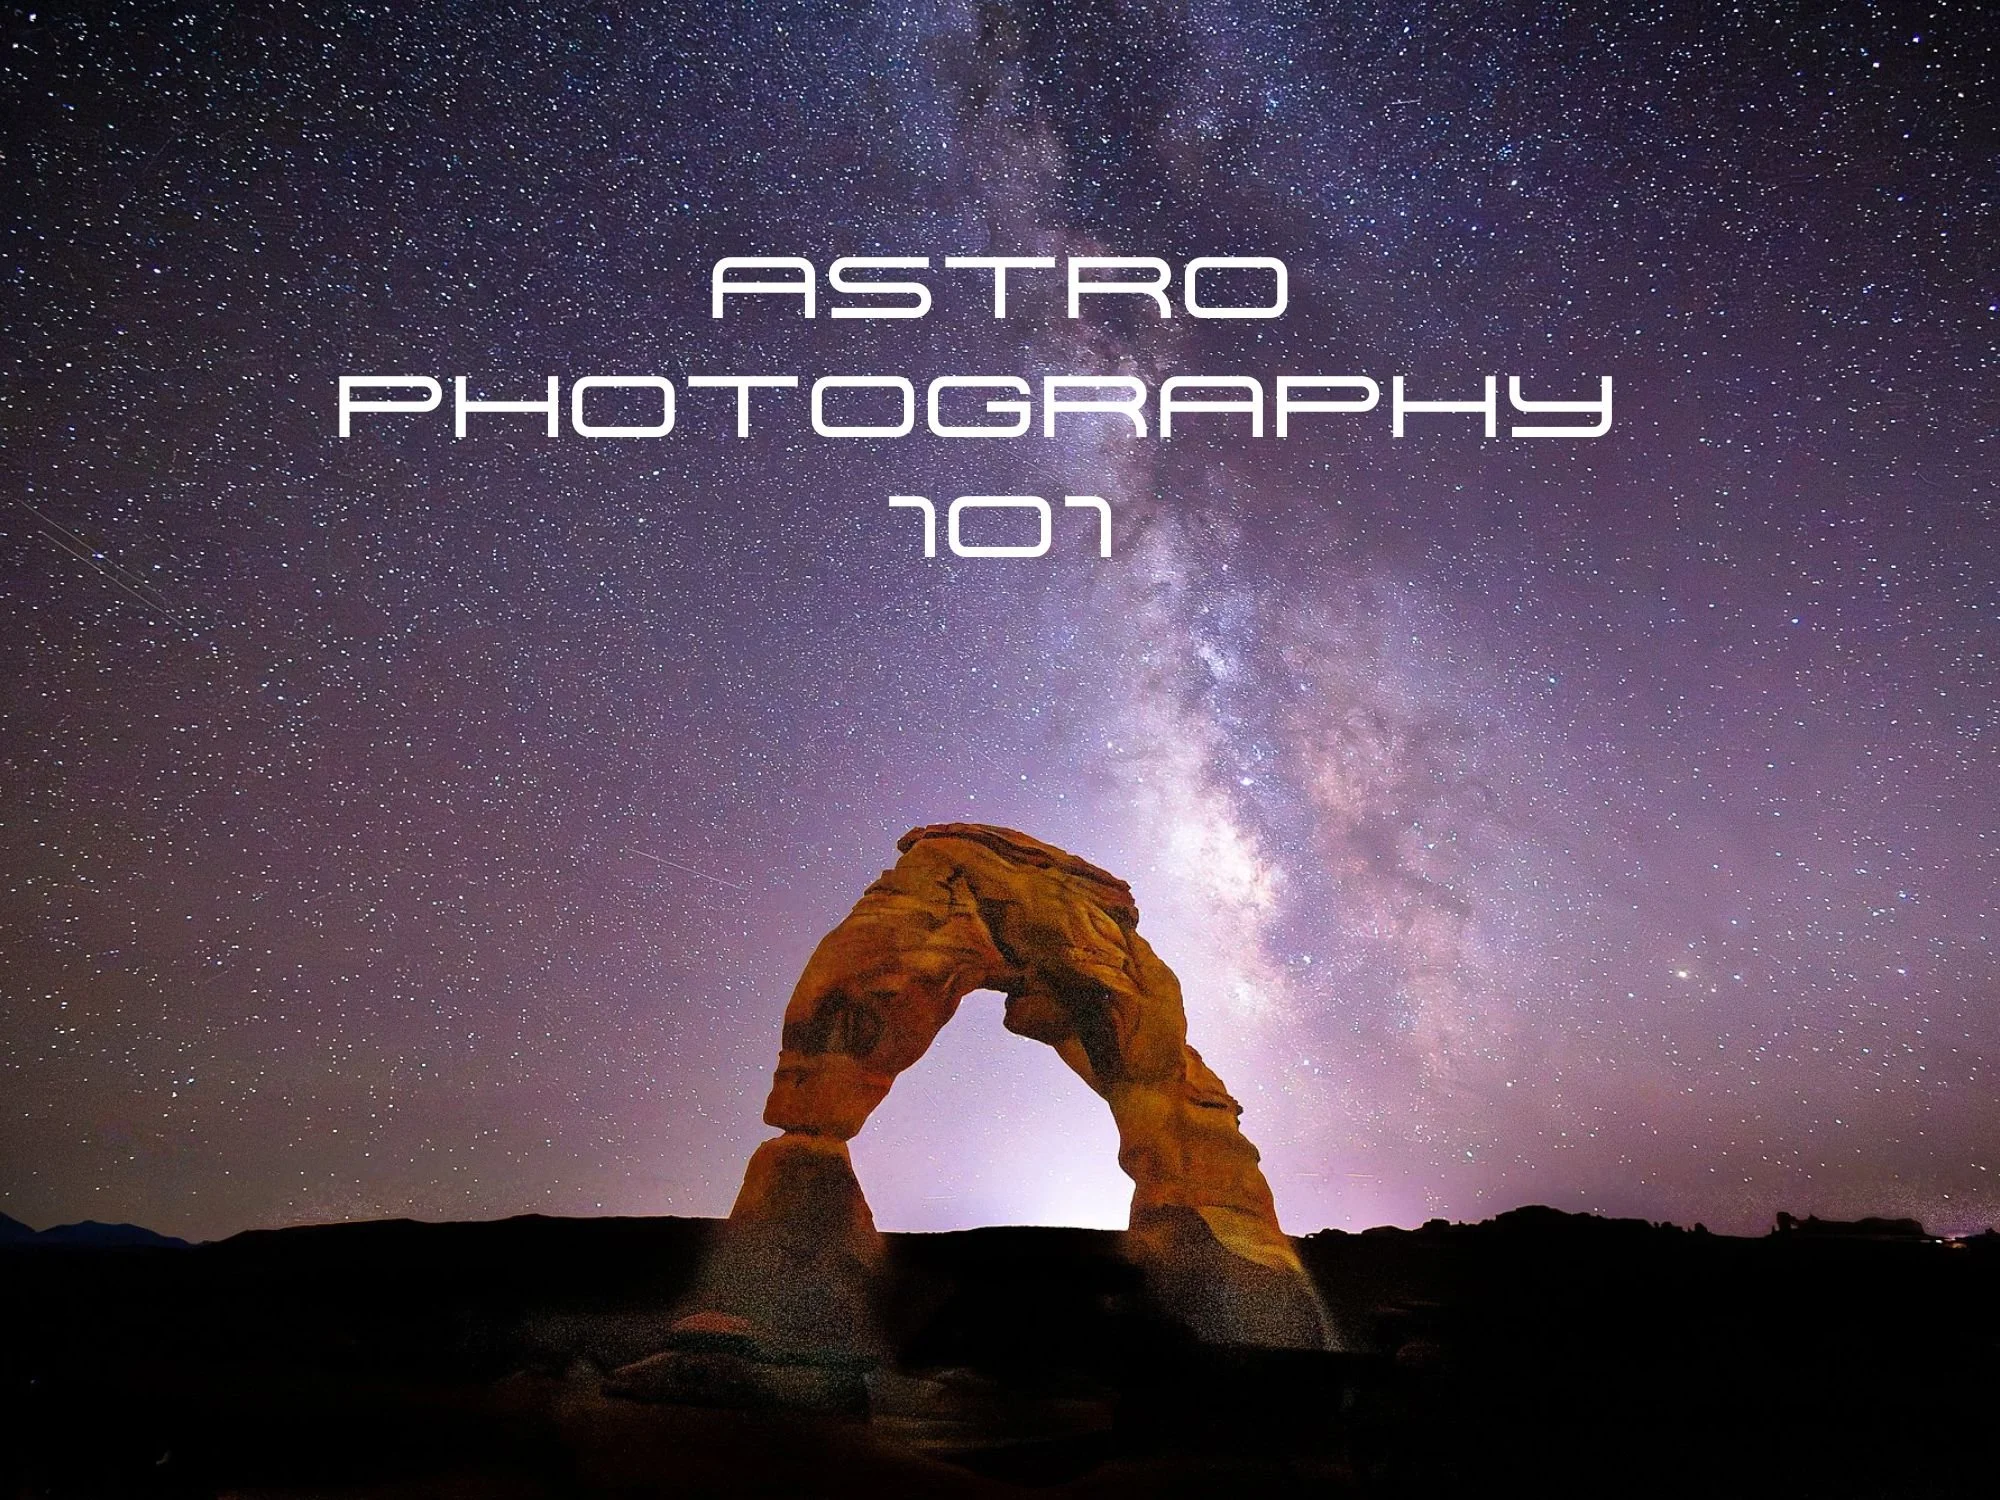
Astrophotography 101
Astrophotography doesn’t have to be complicated. In this guide, I’m breaking down exactly how I capture the night sky from camera settings to composition using real examples from shooting in Utah’s dark skies. Whether you’re a beginner photographer or just want a expand your skills, this is everything you need to get started.
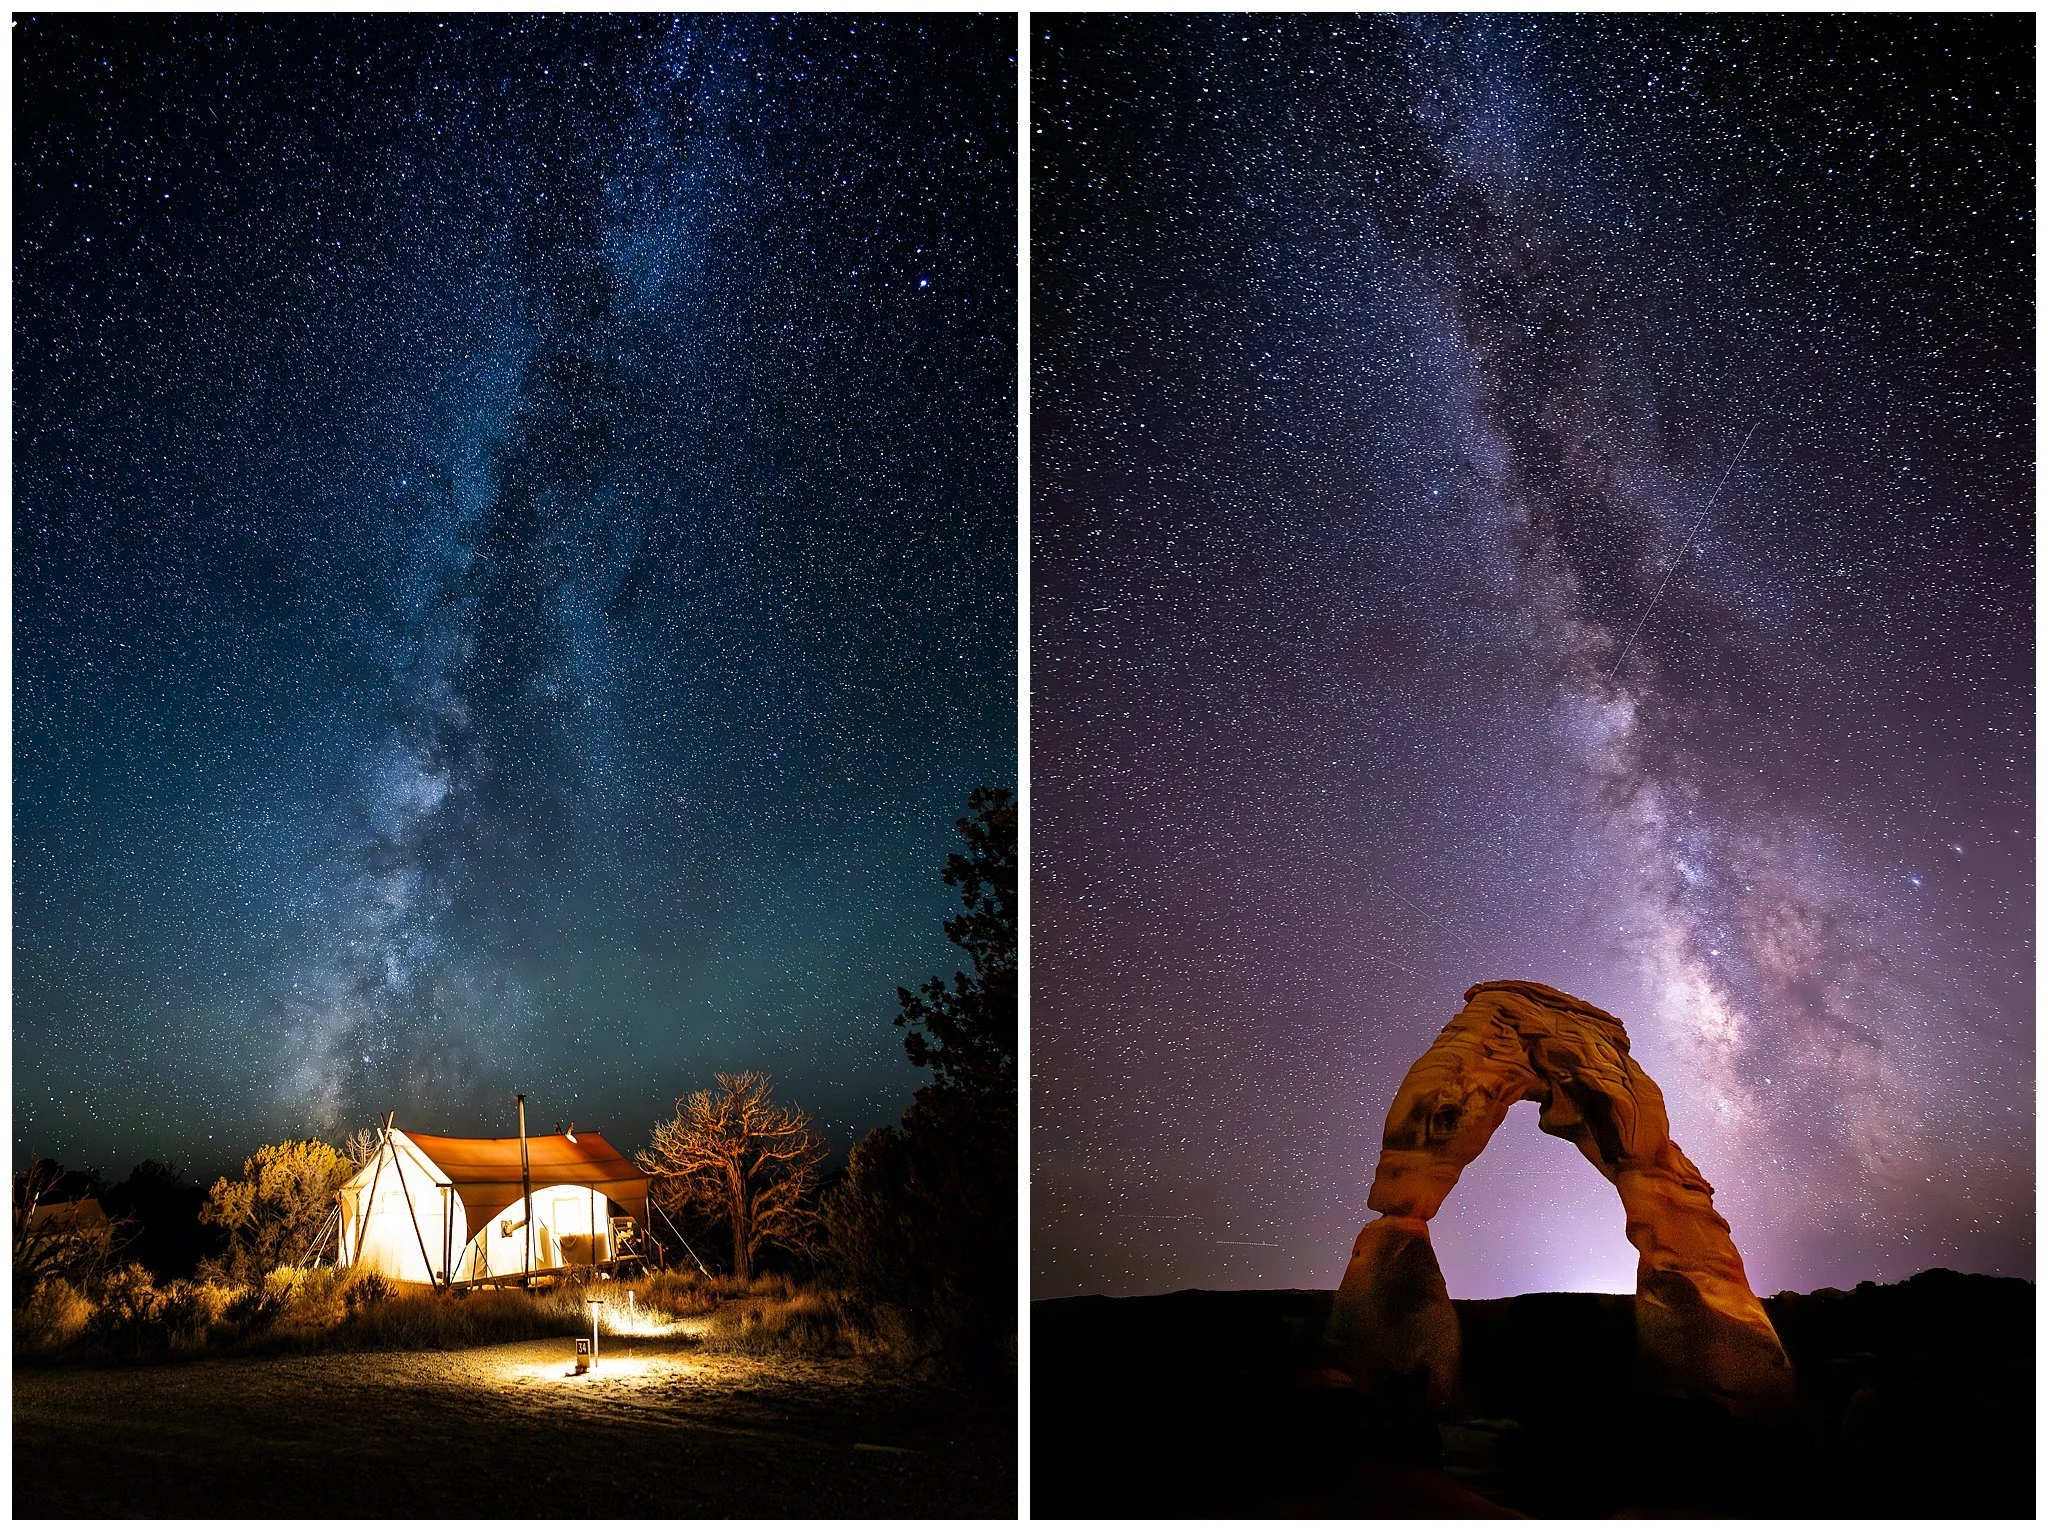
Astrophotography used to feel intimidating to me, like something reserved for people with wildly technical setups and infinite patience. But after a few nights under the stars in Arches National Park and the insanely dark skies at ULUM Moab, I realized it’s way more accessible (and way more magical) than it seems.
Here’s exactly how I approach it, simple, realistic, and without overcomplicating things.
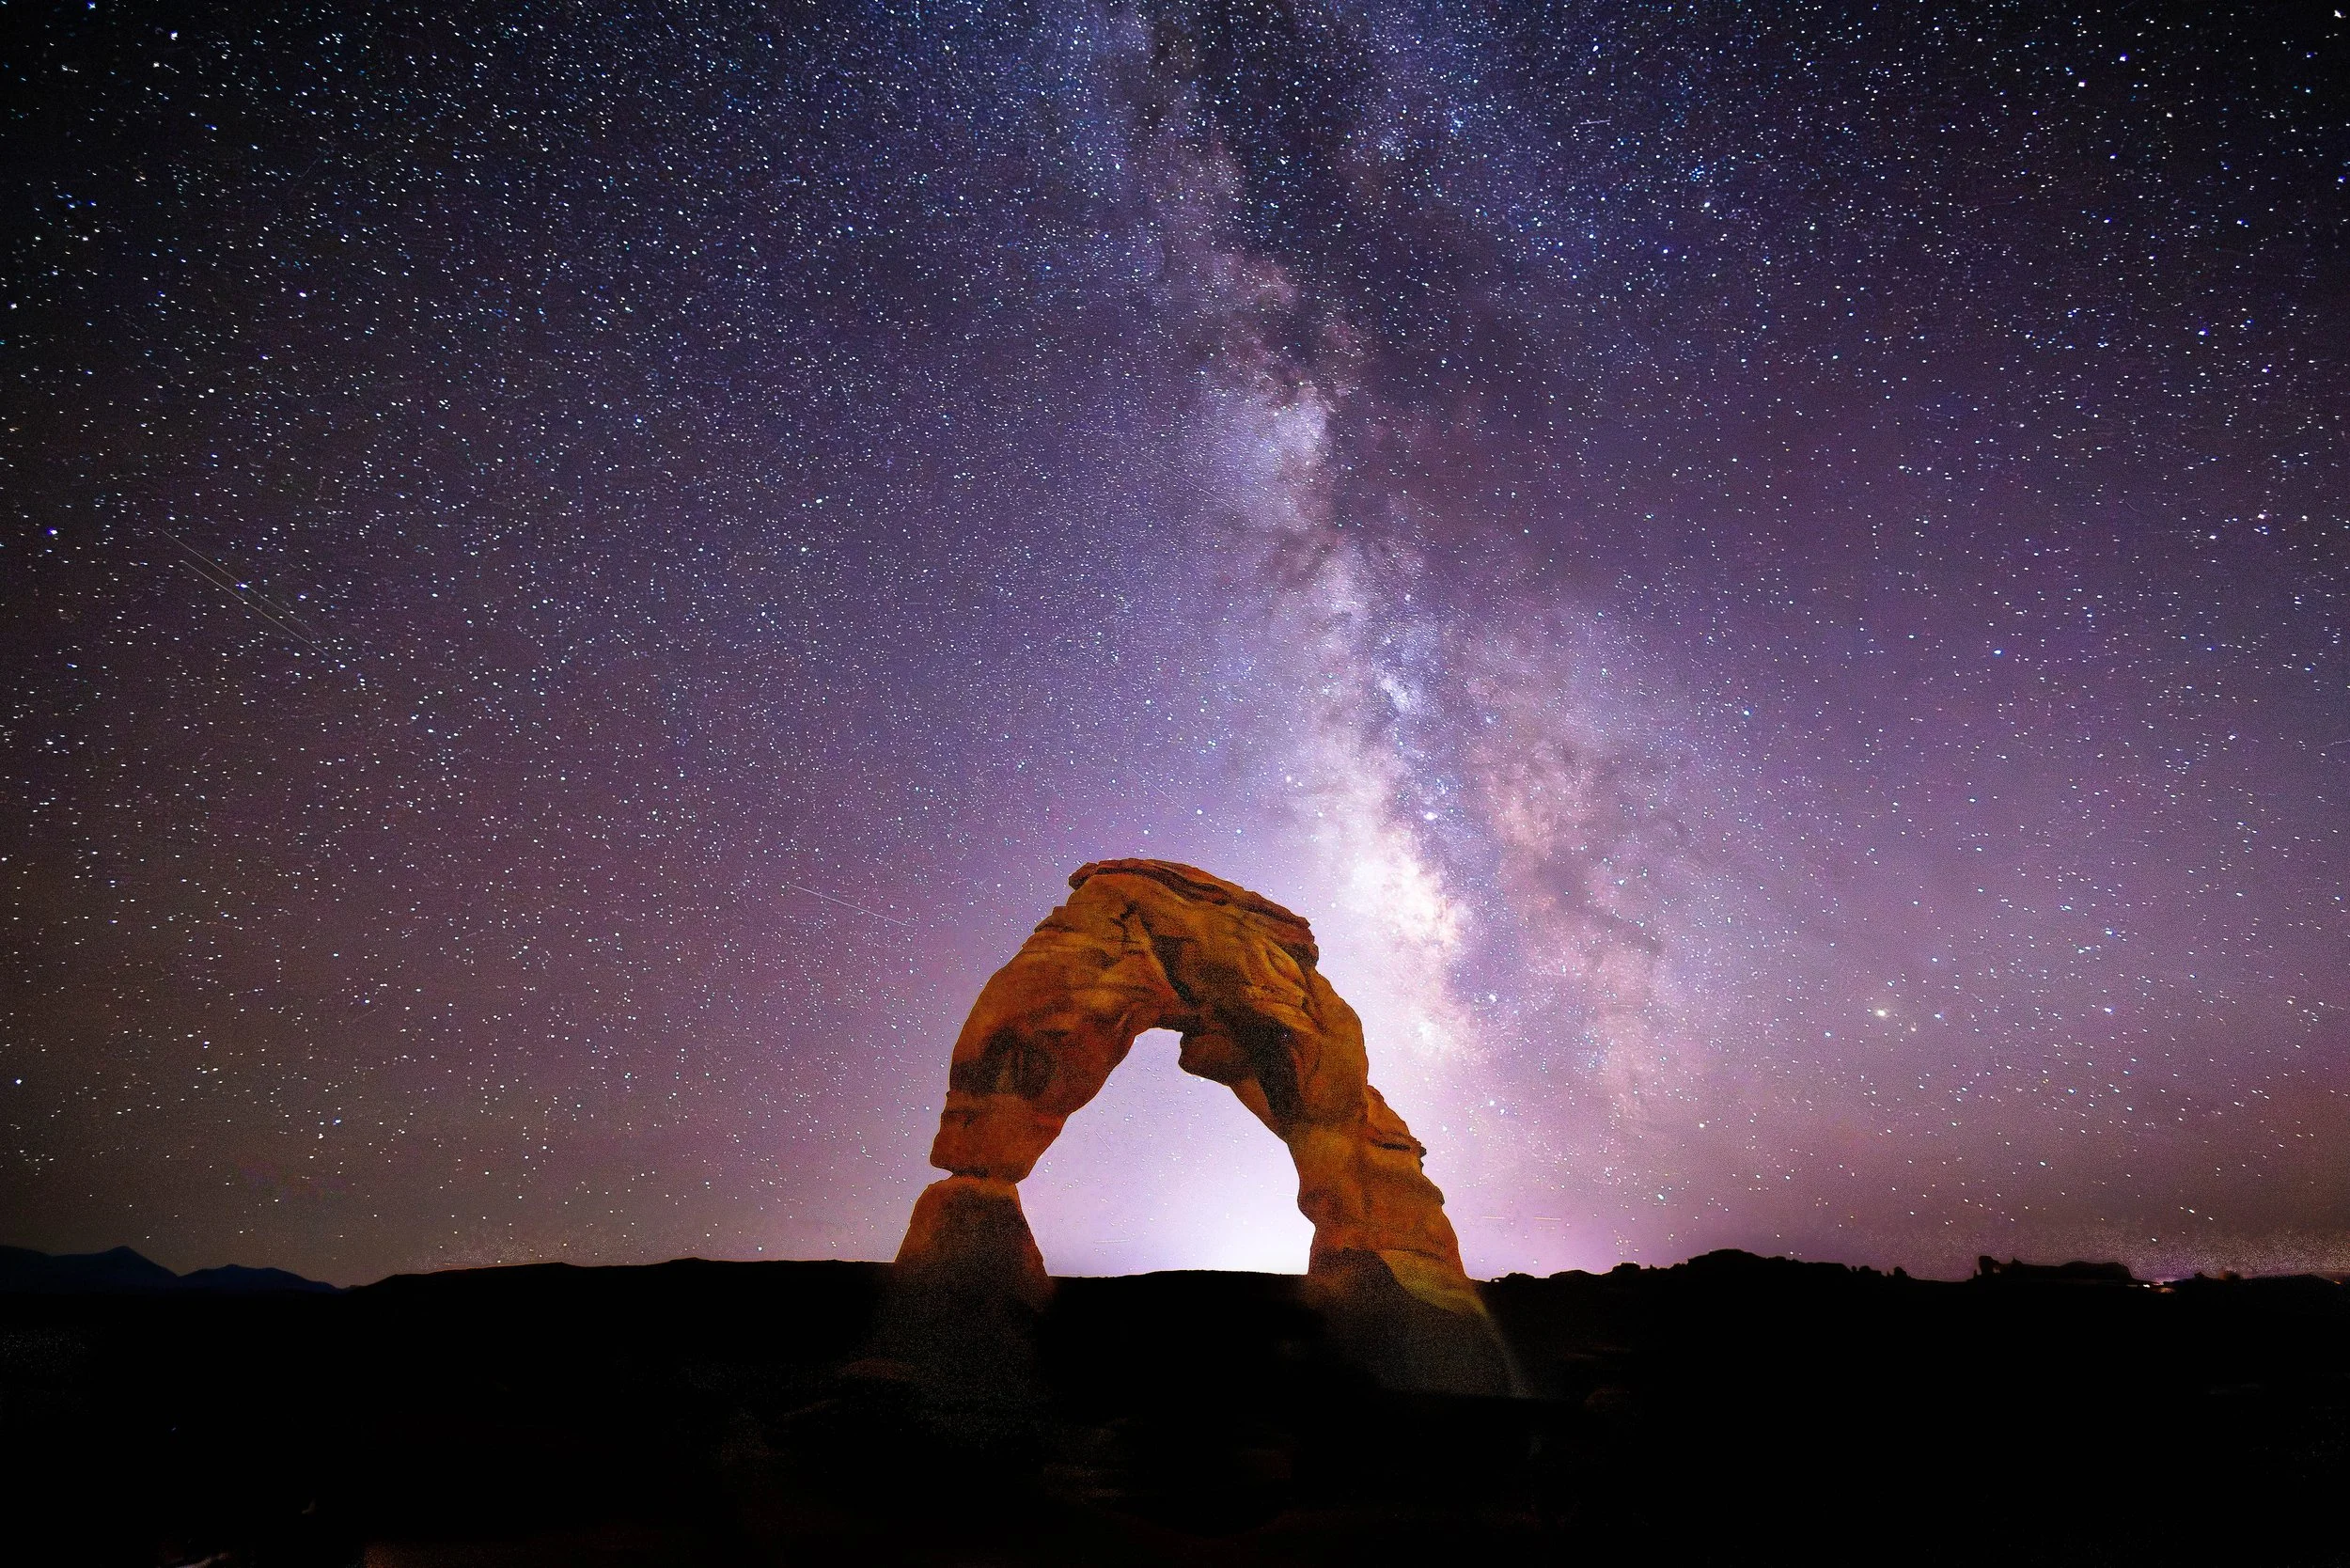
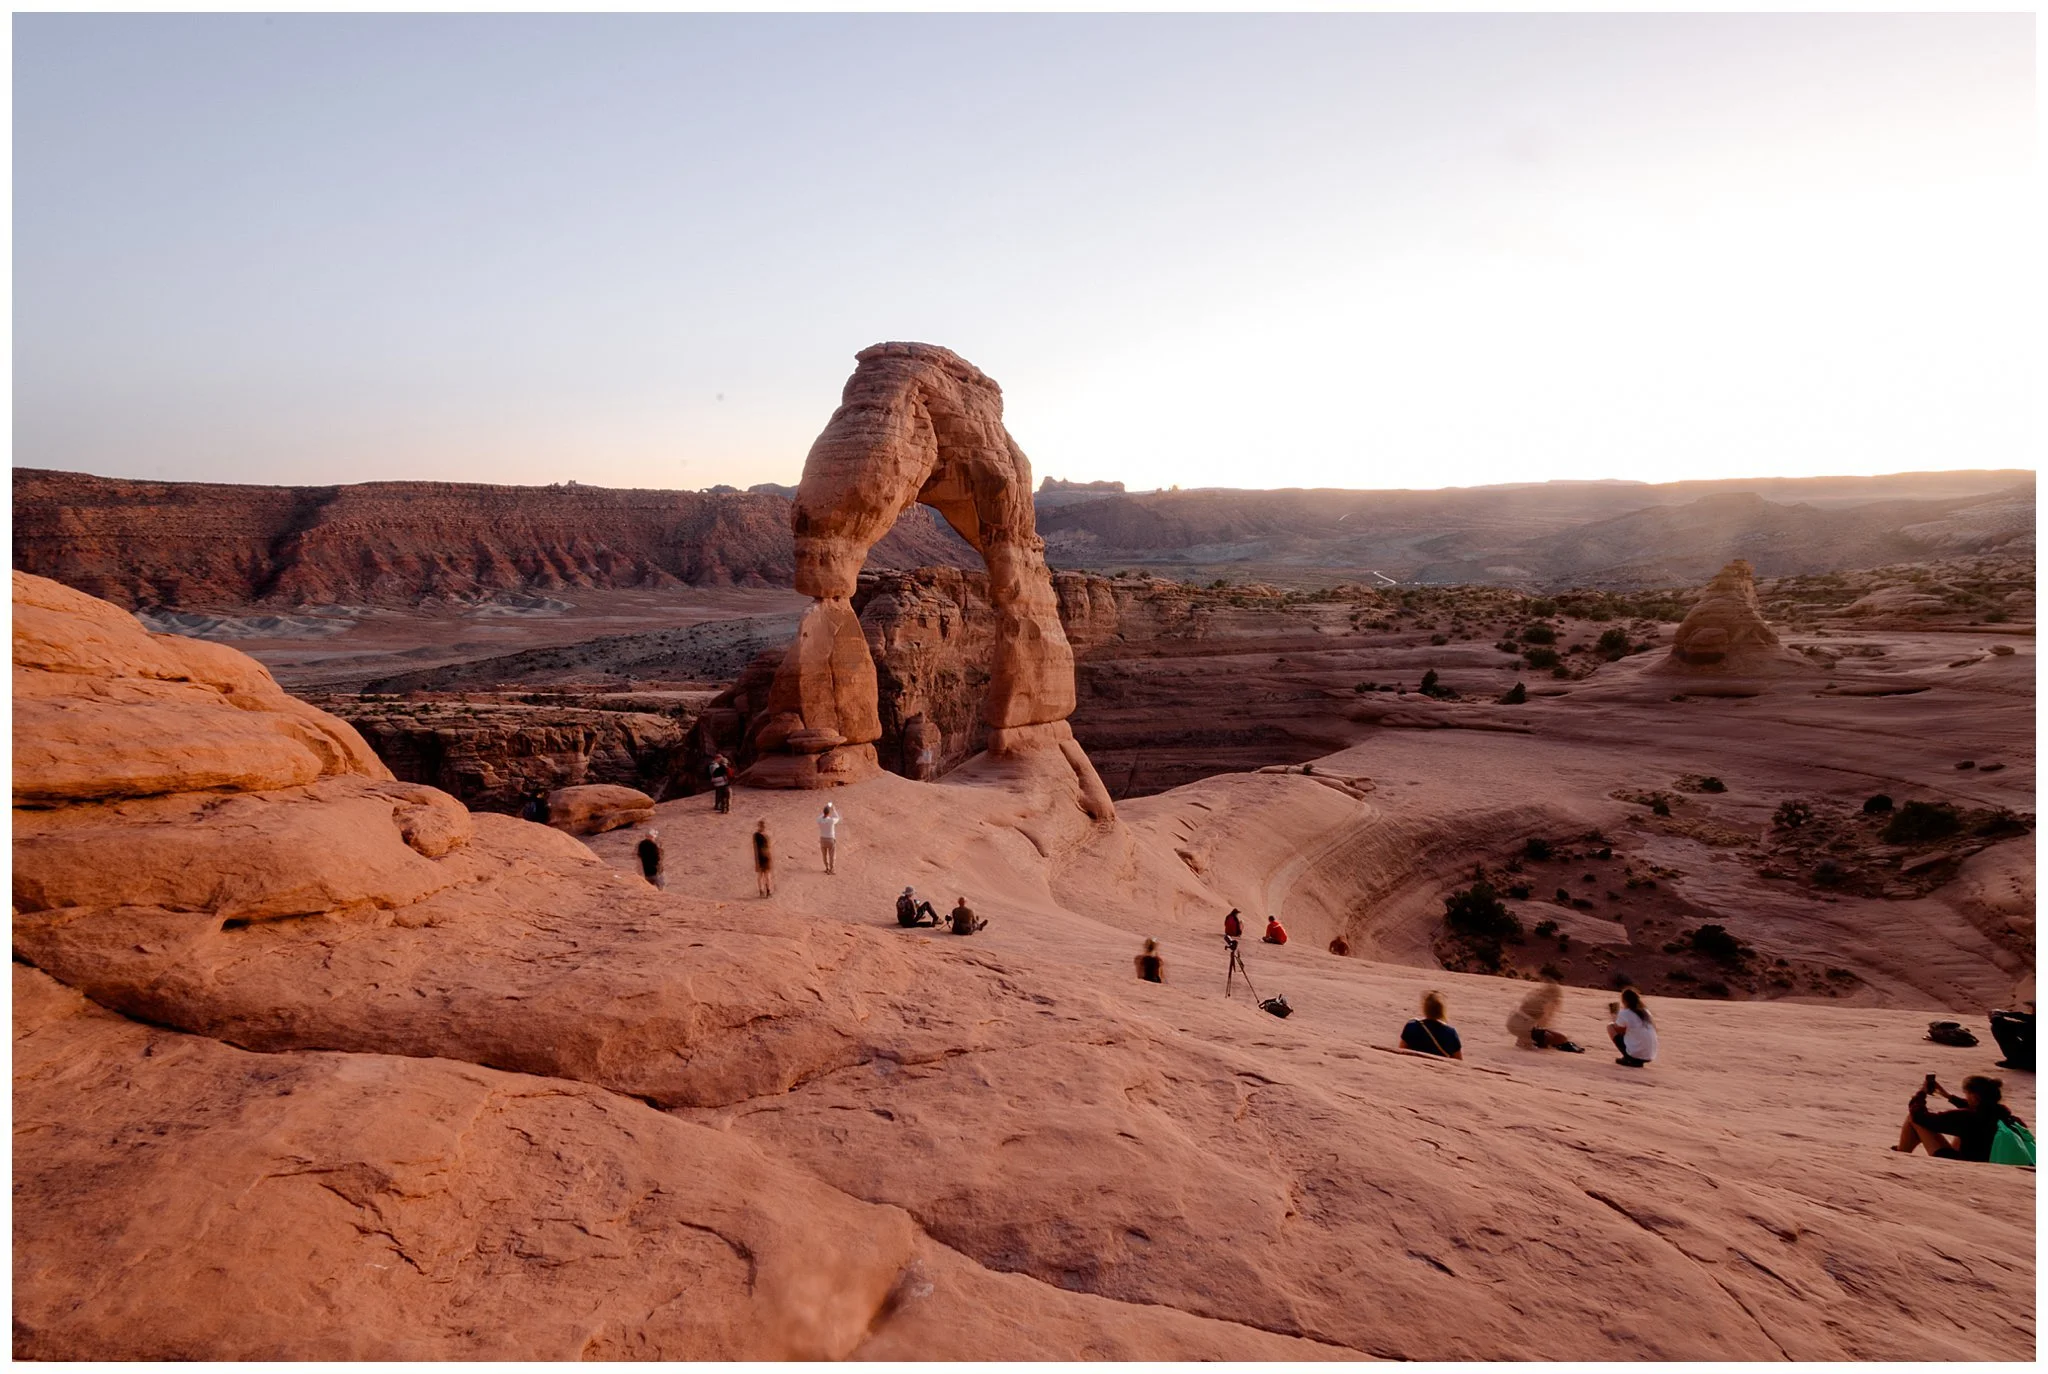
Delicate Arch, Arches National Park
Start With the Right Location
Not all skies are created equal. If you want those crisp, star-packed images, you need complete darkness. You need to be hours away from city light even minimal moon light. You also need a clear night sky, so keep an eye on the forecast! Higher elevation also offers a clearer sky viewing.
Places like Arches National Park are incredible because they’re far from city light pollution. And staying somewhere like ULUM Moab? Game changer! You can literally walk outside and be under a sky full of stars without driving anywhere. You can find other certified locations by looking at DarkSky International.
And The Right Timing
In the Northern Hemisphere, the Milky Way core is most visible from about March to October. To minimize moonlight you’ll want to plan for the days around a new moon.
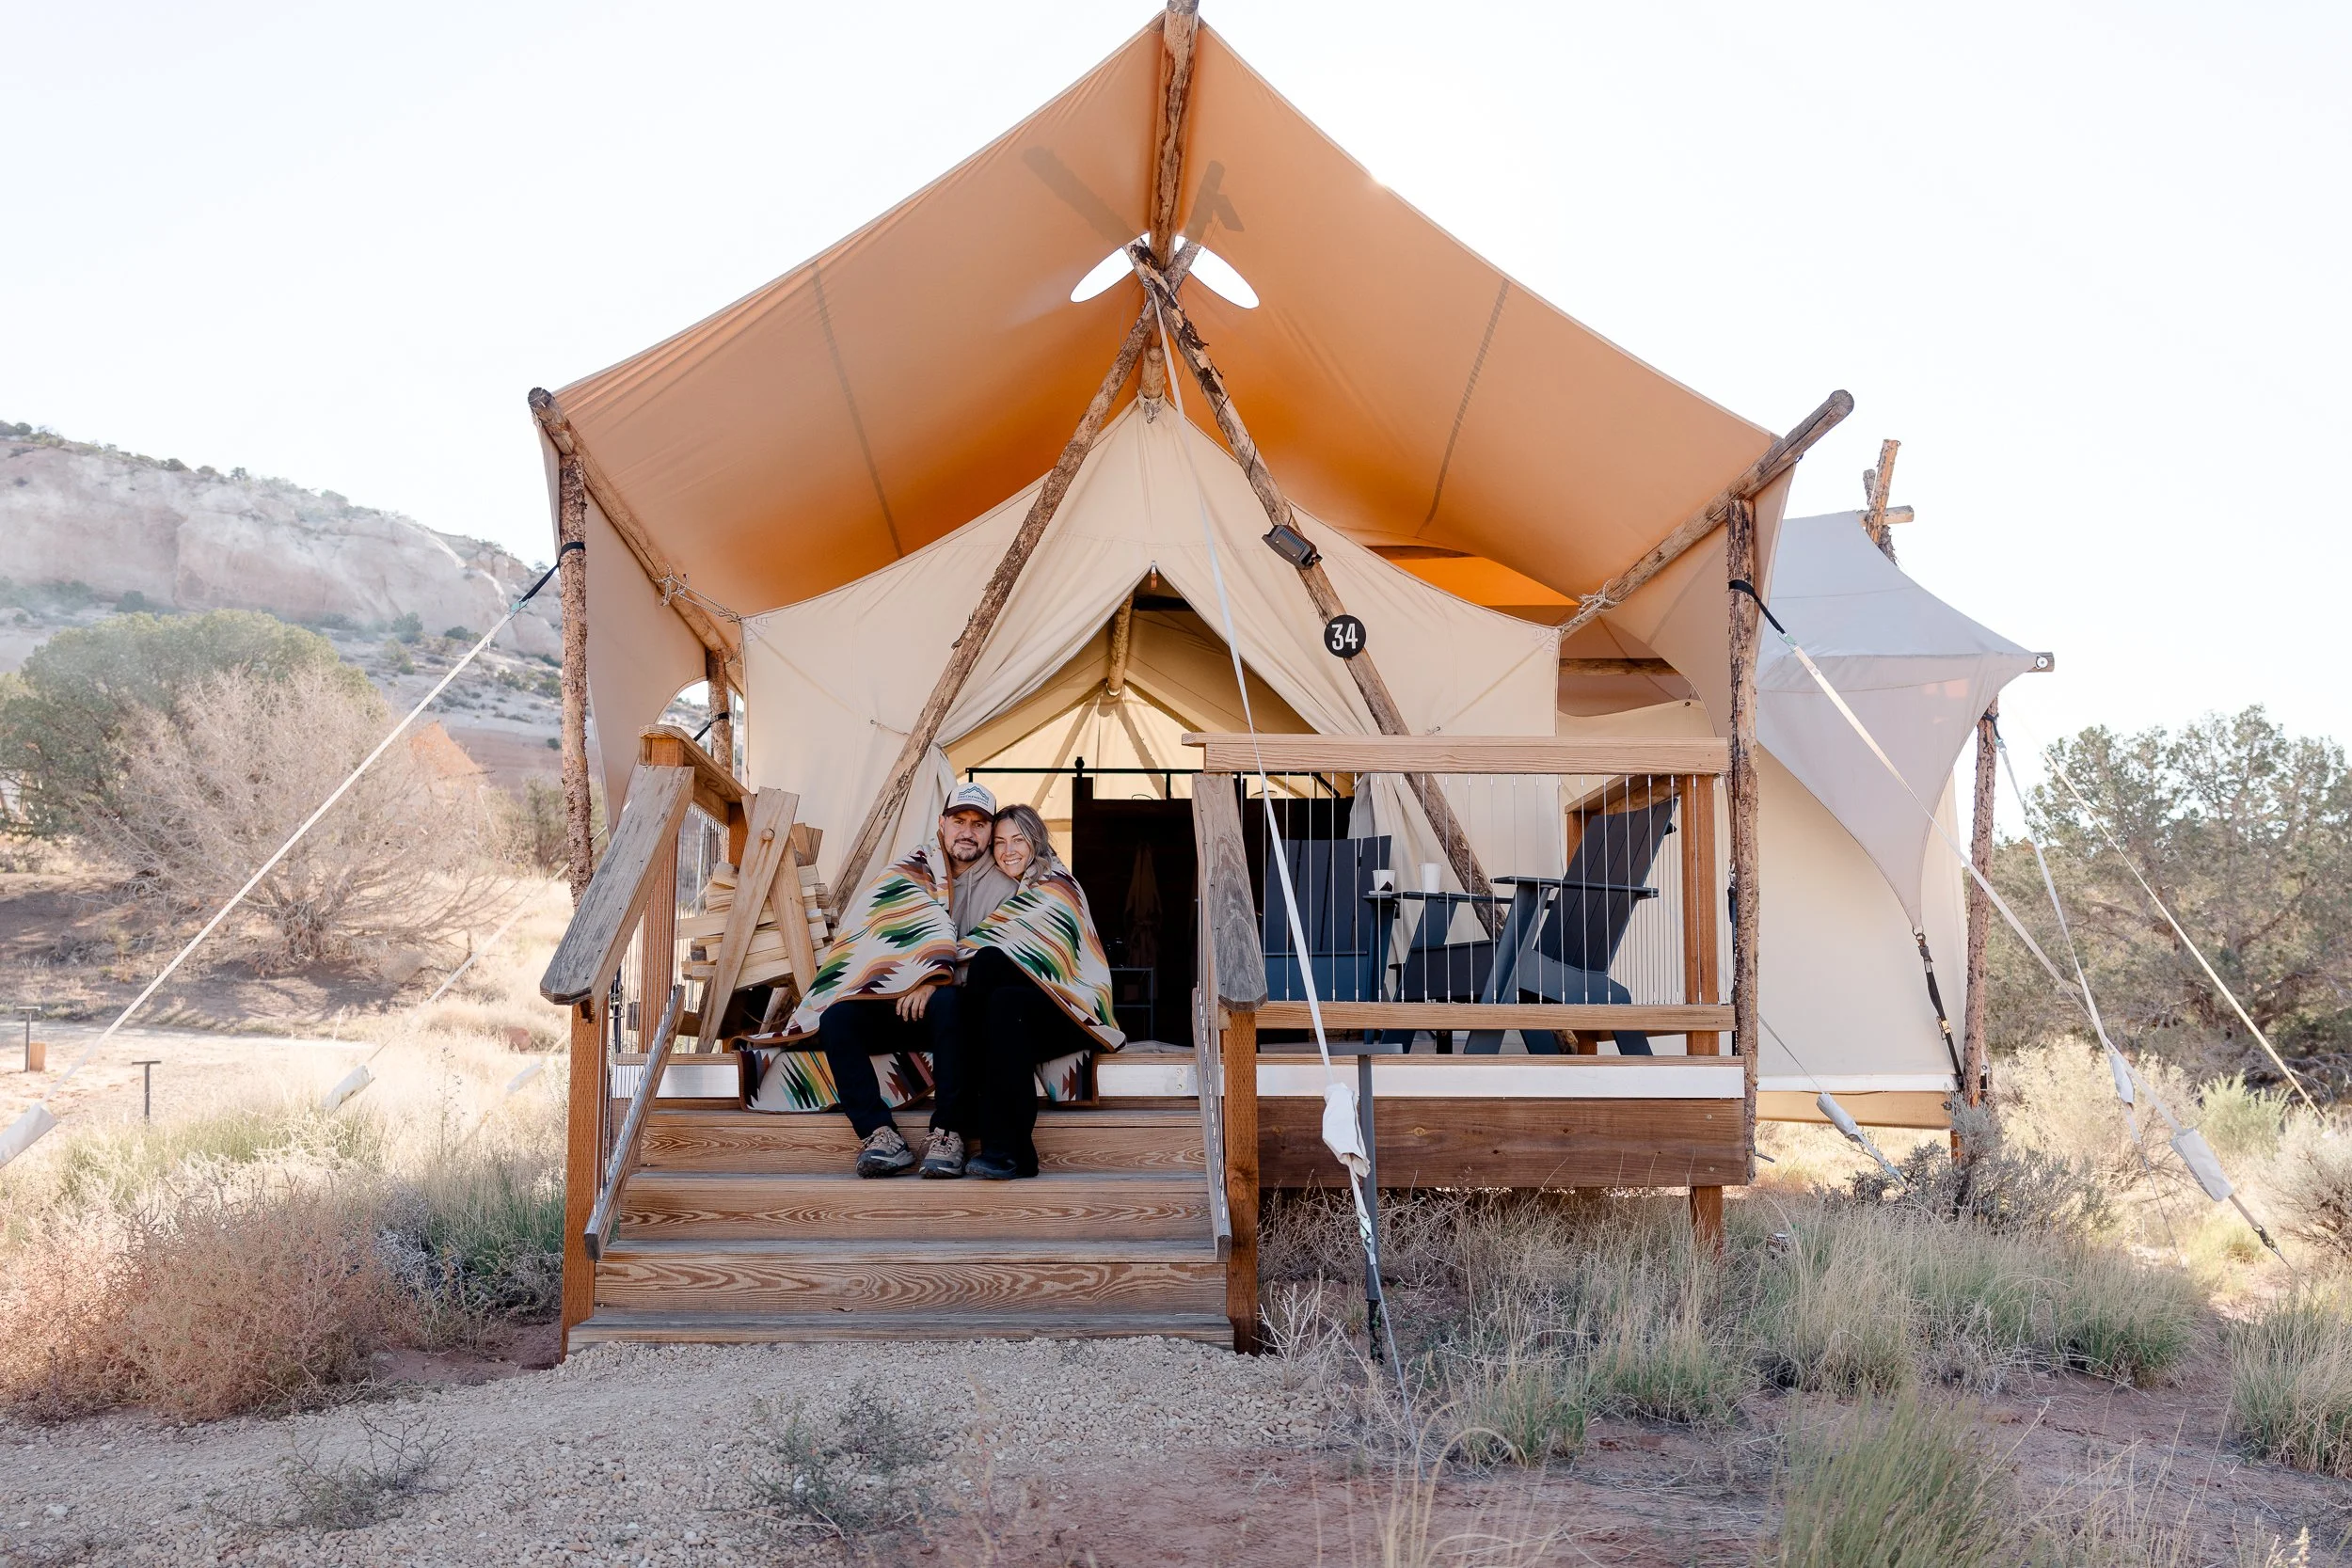
ULUM Resort Moab
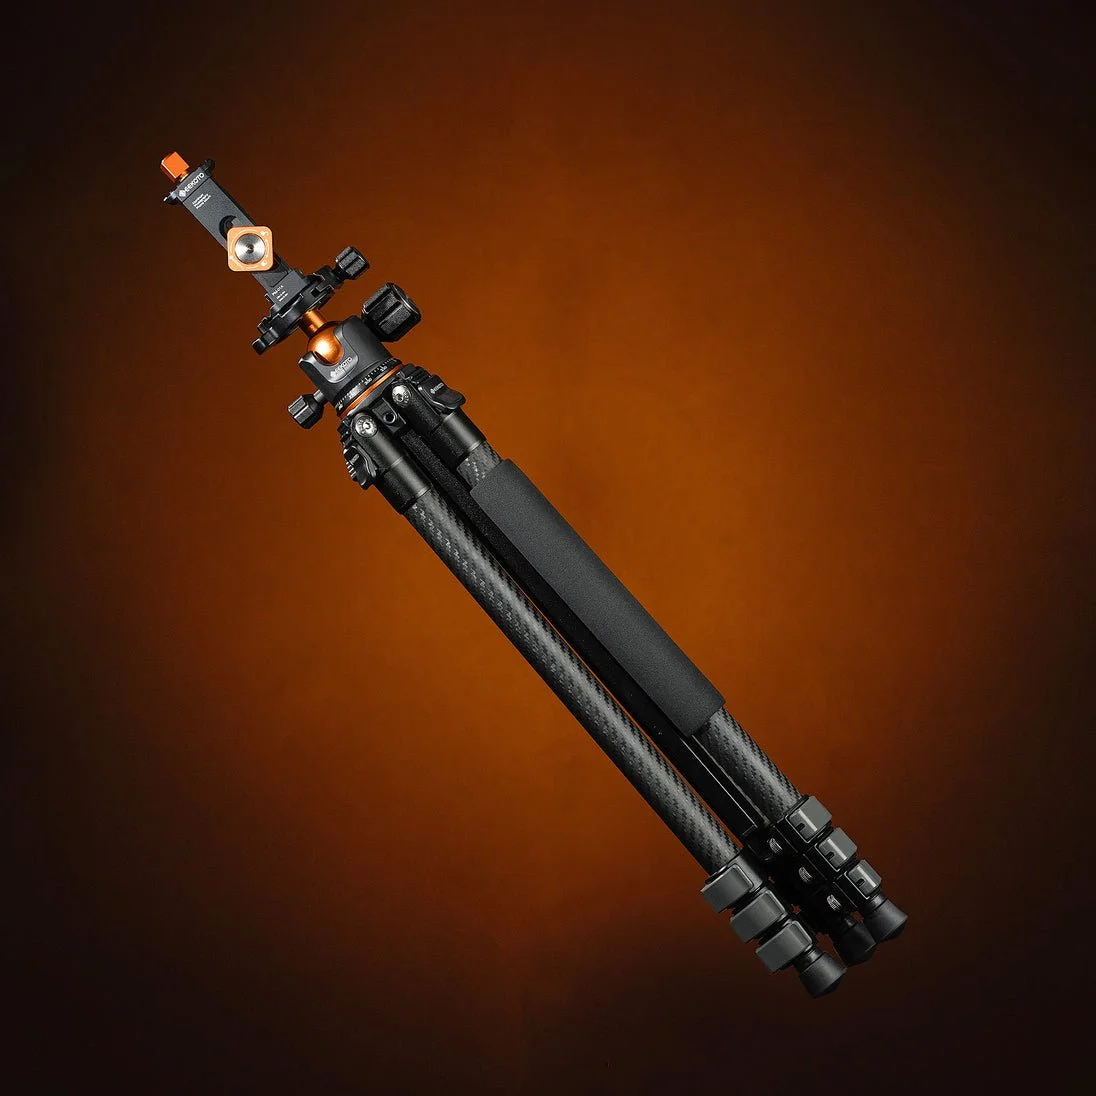
Gear I Use
You don’t need a crazy setup but a few things really matter:
Camera with manual settings (DSLR or mirrorless)
Wide-angle lens (something like 14–24mm is ideal)
Tripod (non-negotiable)
For 10% off use code: Mandy10
Other Useful Gear
Red headlamp/flashlight as it preserves night vision and has minimal scene contamination
Electrical tape to cover any unsuspecting led lights on gear
My Go-To Settings
The basic concept is that we want to let in as much light as possible so that we can capture the stars, but the problem is that if our shutter is left open for too long we will see the movement of the earth’s rotation through star trails. To get the bright crisp stars, we have to find the sweet spot for the conditions we are in and the gear we are using.
These are my starting settings, and I adjust exposure slightly depending on the scene:
Aperture: f/1.8 (or as wide as your lens allows)
Shutter speed: 15–25 seconds
ISO: 3200–6400
Focus: Manual, set to infinity
Timer: 2 secs
File Format: RAW
*Your camera may have a starlight/night mode that you can turn on to make your screen red and easier to see in the dark.
Finding Composition in the Dark
This is where your photographer brain comes in. Don’t just shoot the sky, compose your image.
It helps to know the area or at least pick a spot and set up before nightfall. Use a Milky Way finder app to make sure you are pointed in the right direction.
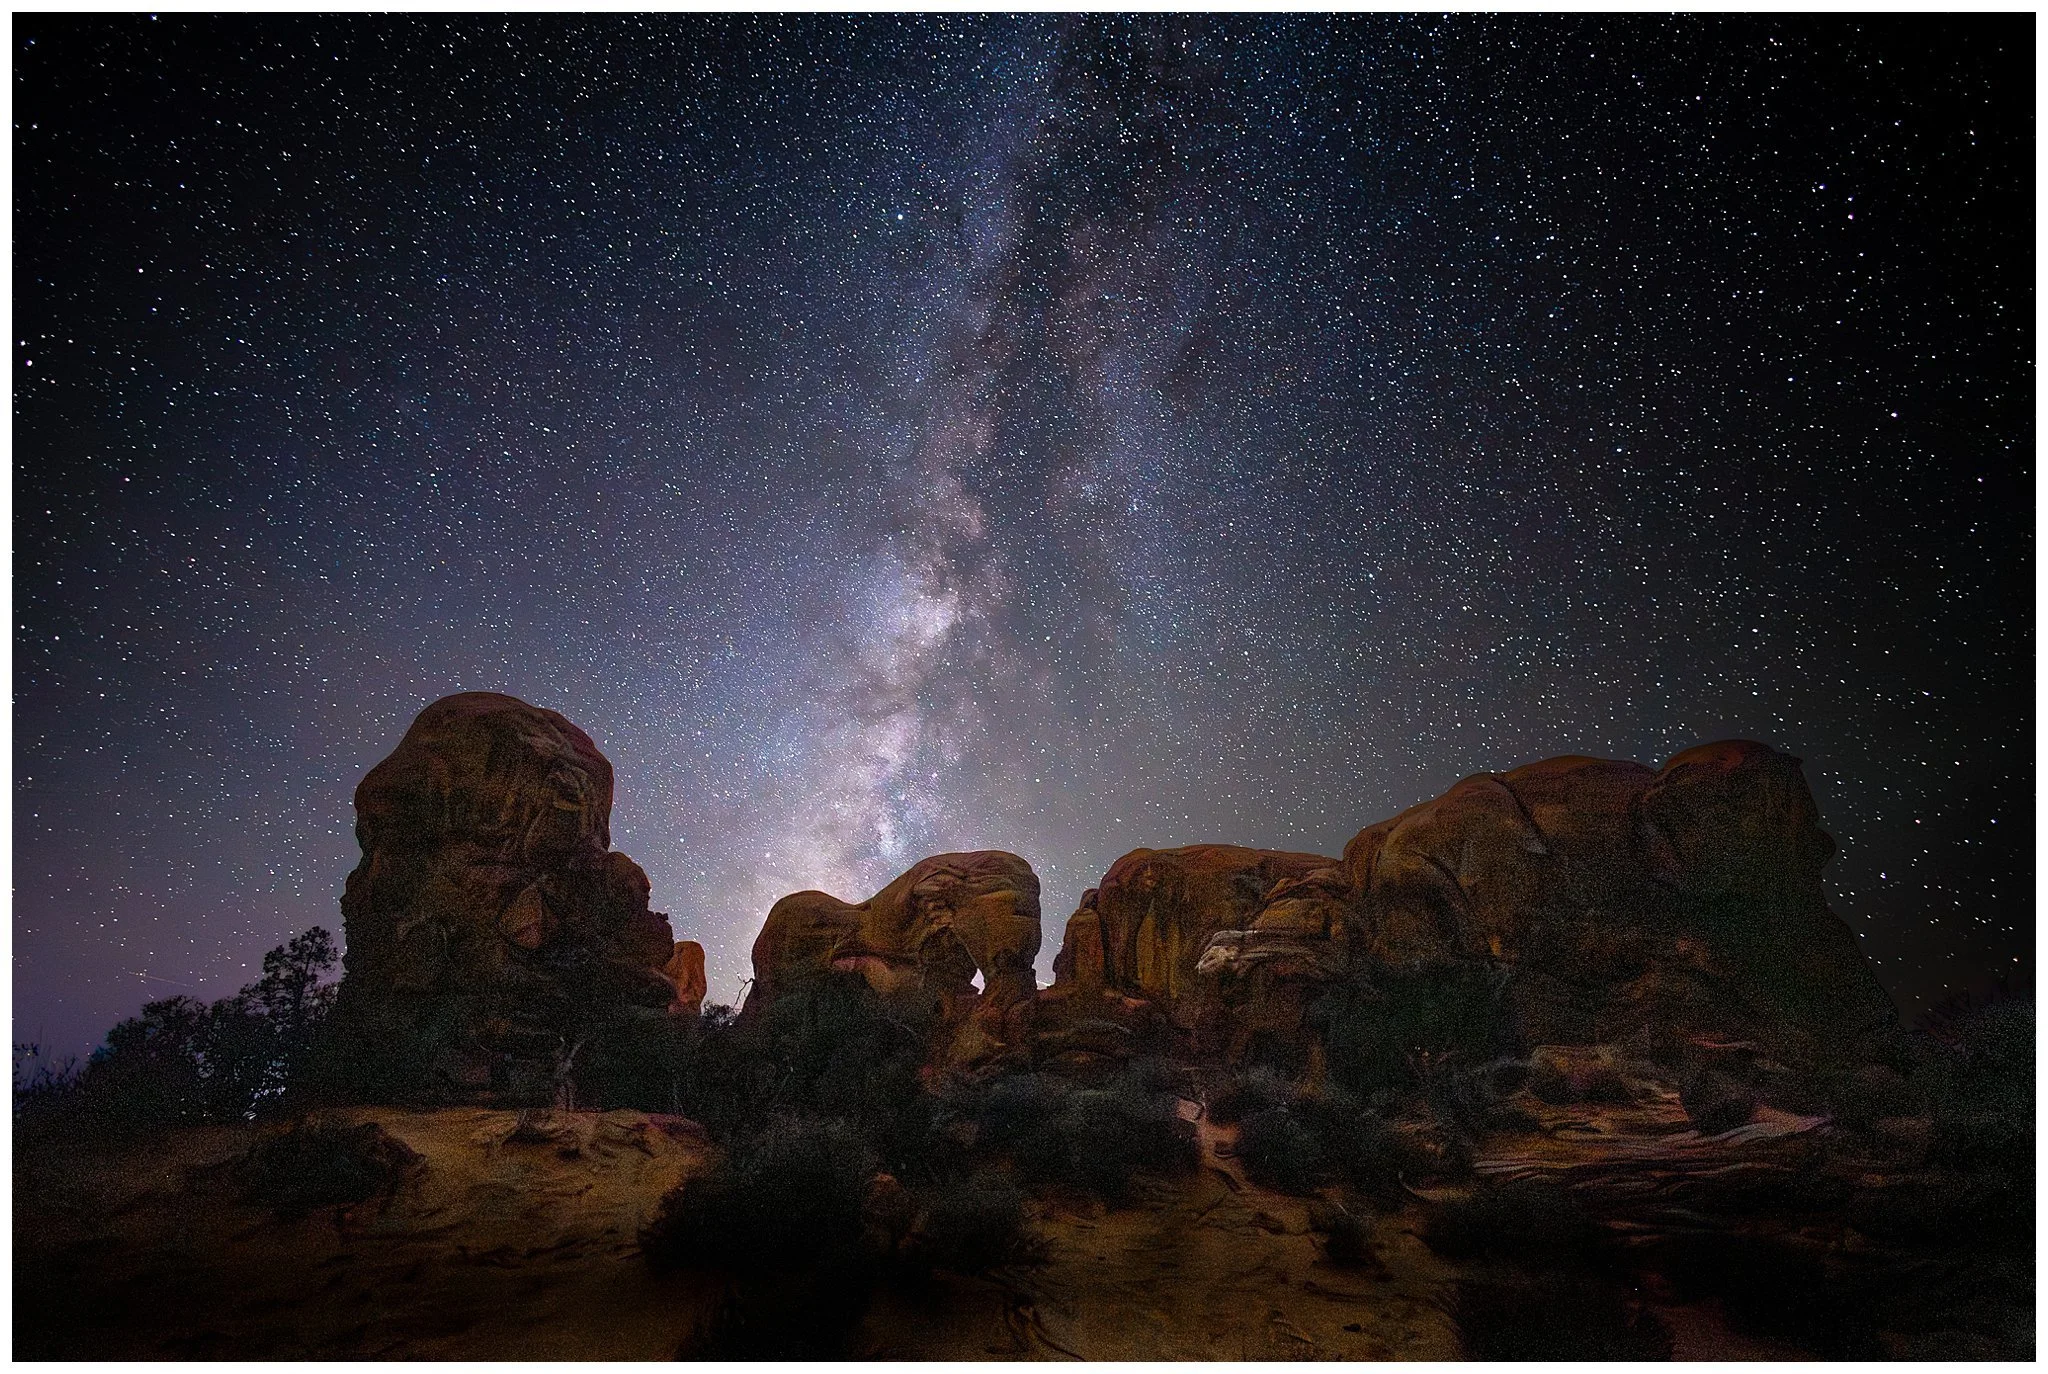
In Arches National Park, I used the natural rock formations to frame the stars. At ULUM Moab, I leaned into the unique structures and desert landscape to add interest.
Think:
Silhouettes
Leading lines
Framing elements
Foreground to add depth
It makes your image feel intentional, not just a snapshot of the sky. You can even consider adding a person to the composition, either by silhouette or lighting them.
Dusk at Delicate Arch, Arches National Park Utah
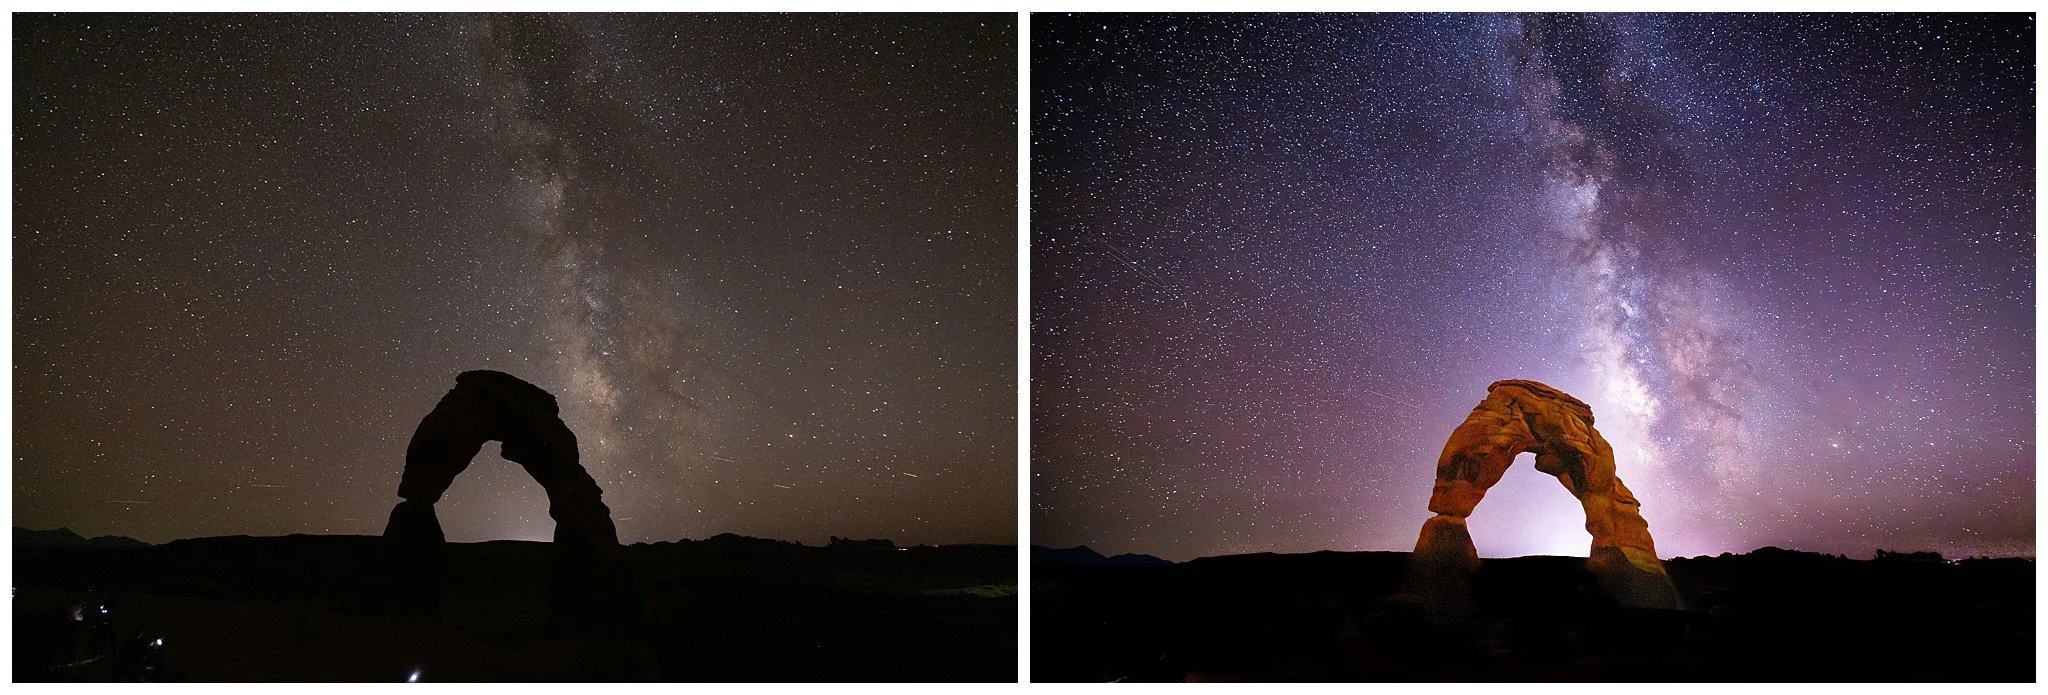
Editing Makes a Huge Difference
Your RAW image will probably look very flat at first
In editing, I typically:
Boost contrast
Pull out shadows
Adjust white balance (cooler tones usually work beautifully)
Denoise
Sharpen to enhance stars slightly without overdoing it
Clone out light pollution (photographer lights, airplane trails, etc.)
The goal is to keep it feeling natural while bringing back what your eyes felt in that moment.
Here is a Before and After of lightroom editing:
SOOC 16mm, F2.8, ISO 5000, 20 Sec.
Lightroom Preset
Thank you for reading this far! If you want a little help on the editing side I created a basic editing preset based on the pointers above. Download it and use it as a starting point to get the stars in your images to shine!
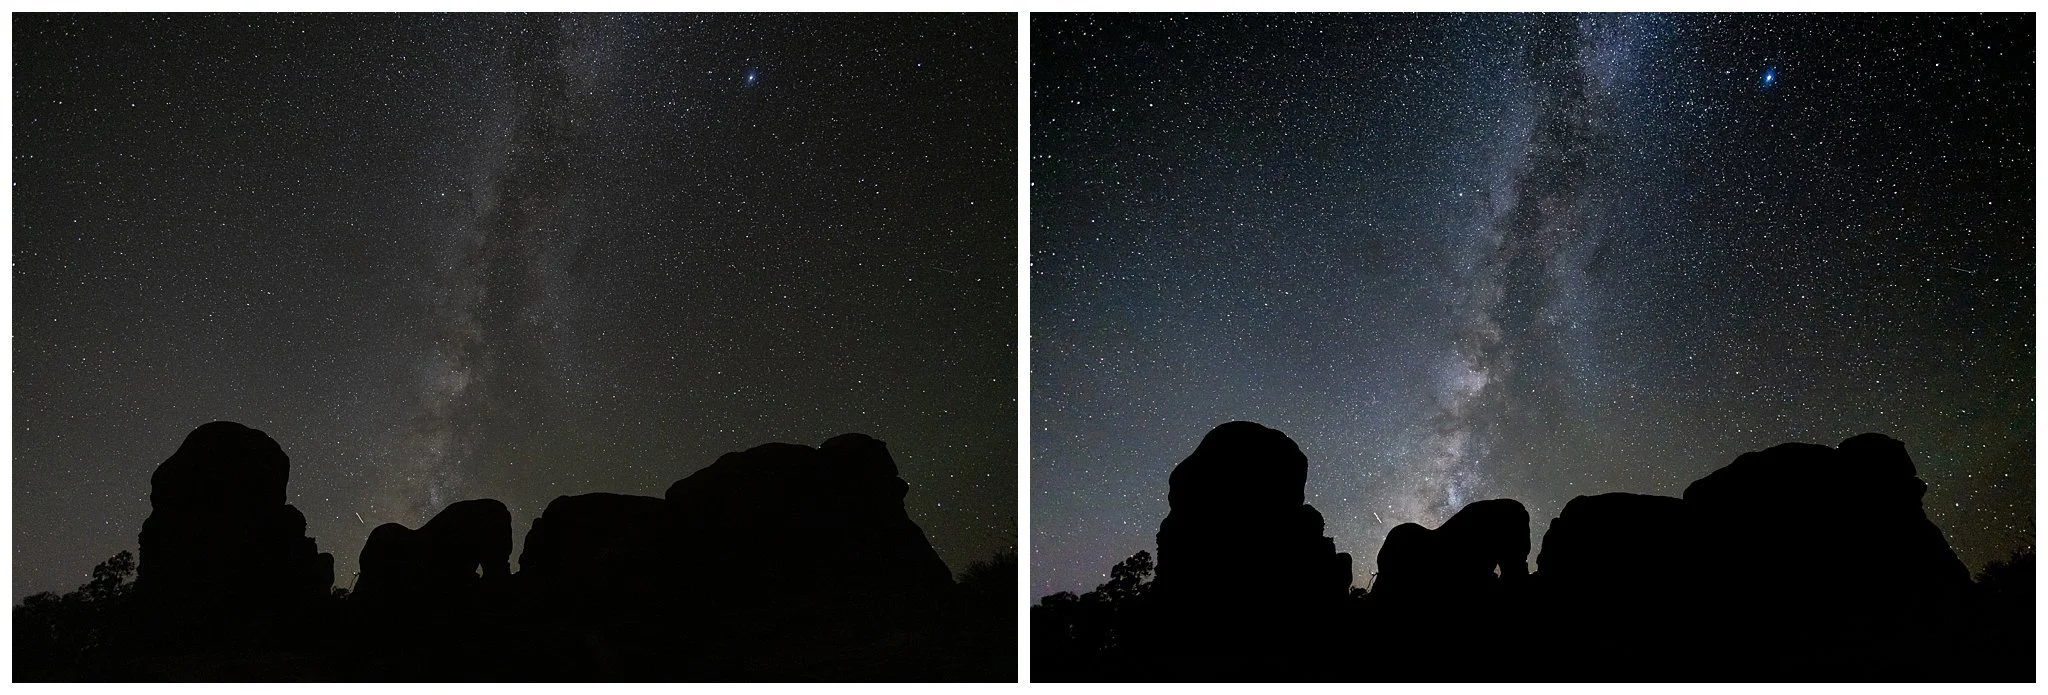
Lightroom preset applied 16mm, F2.8, ISO 8000 10 Sec.
Composite
Consider combining multiple shots into one to properly expose the night sky and any brighter features.
Take a photo with the sky properly exposed (in this case, F2.8, ISO 3200, 20 sec)
Take a second photo with the foreground properly exposed by only adjusting the ISO (F2.8, ISO 1200, 20 sec)
Use the masking feature in Photoshop to combine the properly exposed sky with the image of the properly exposed foreground
Below you can see how the first two images are combined to create the third image.
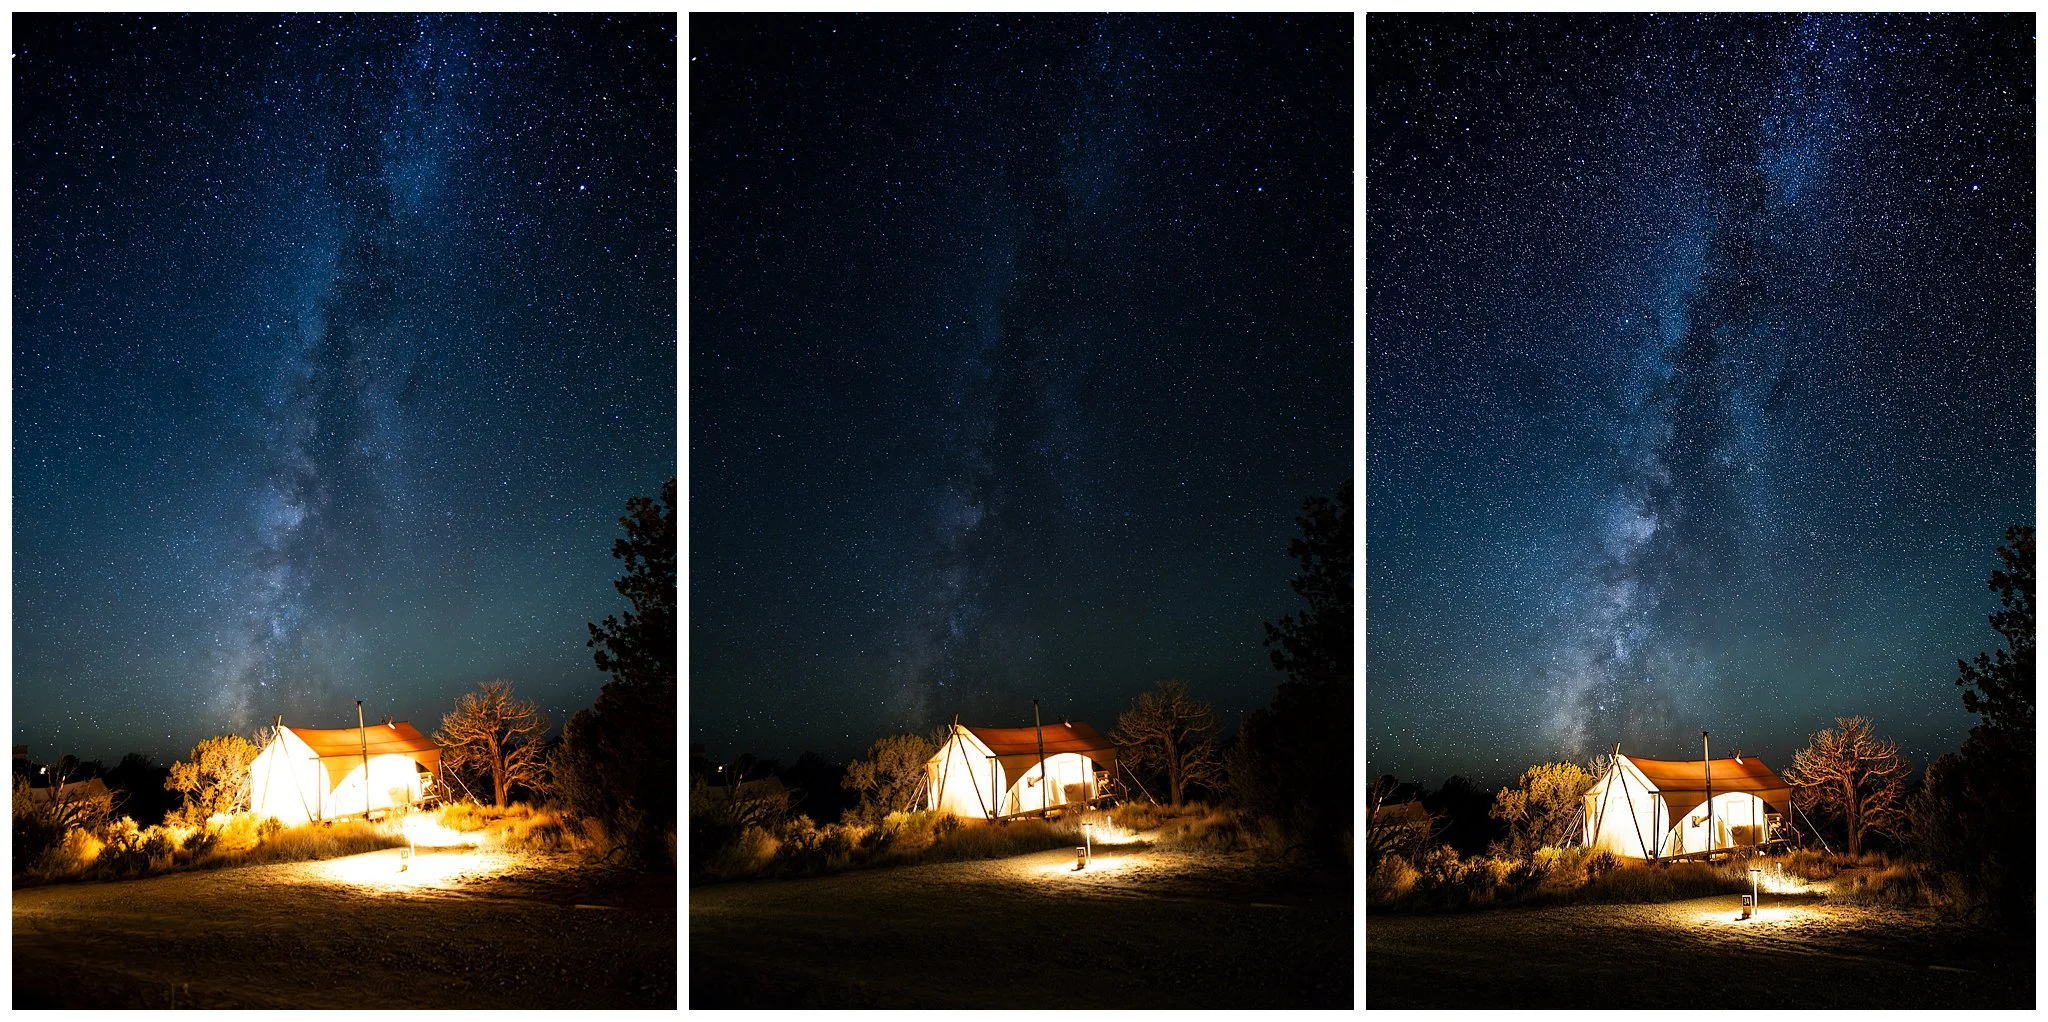
16mm, F2.8, ISO 3200, 20 sec. Additional exposure at ISO 1200
Troubleshooting
-
Your shutter speed is too long. Use the 500 rule calculator as a starting point. If you see trails, try a shorter shutter speed until they are crisp.
-
If you’re wide open and at the maximum shutter speed for crisp stars, the only other option is to increase your ISO. Use Ai denoise in post to help clean it up.
-
Make sure your tripod is on a stable surface. Use a timer or a wireless trigger to make you are not moving the camera when take the exposure. Trees or other features in the photo may look blurry as they will be moving.
-
You might be focusing past infinity, try bringing the focus back a bit.
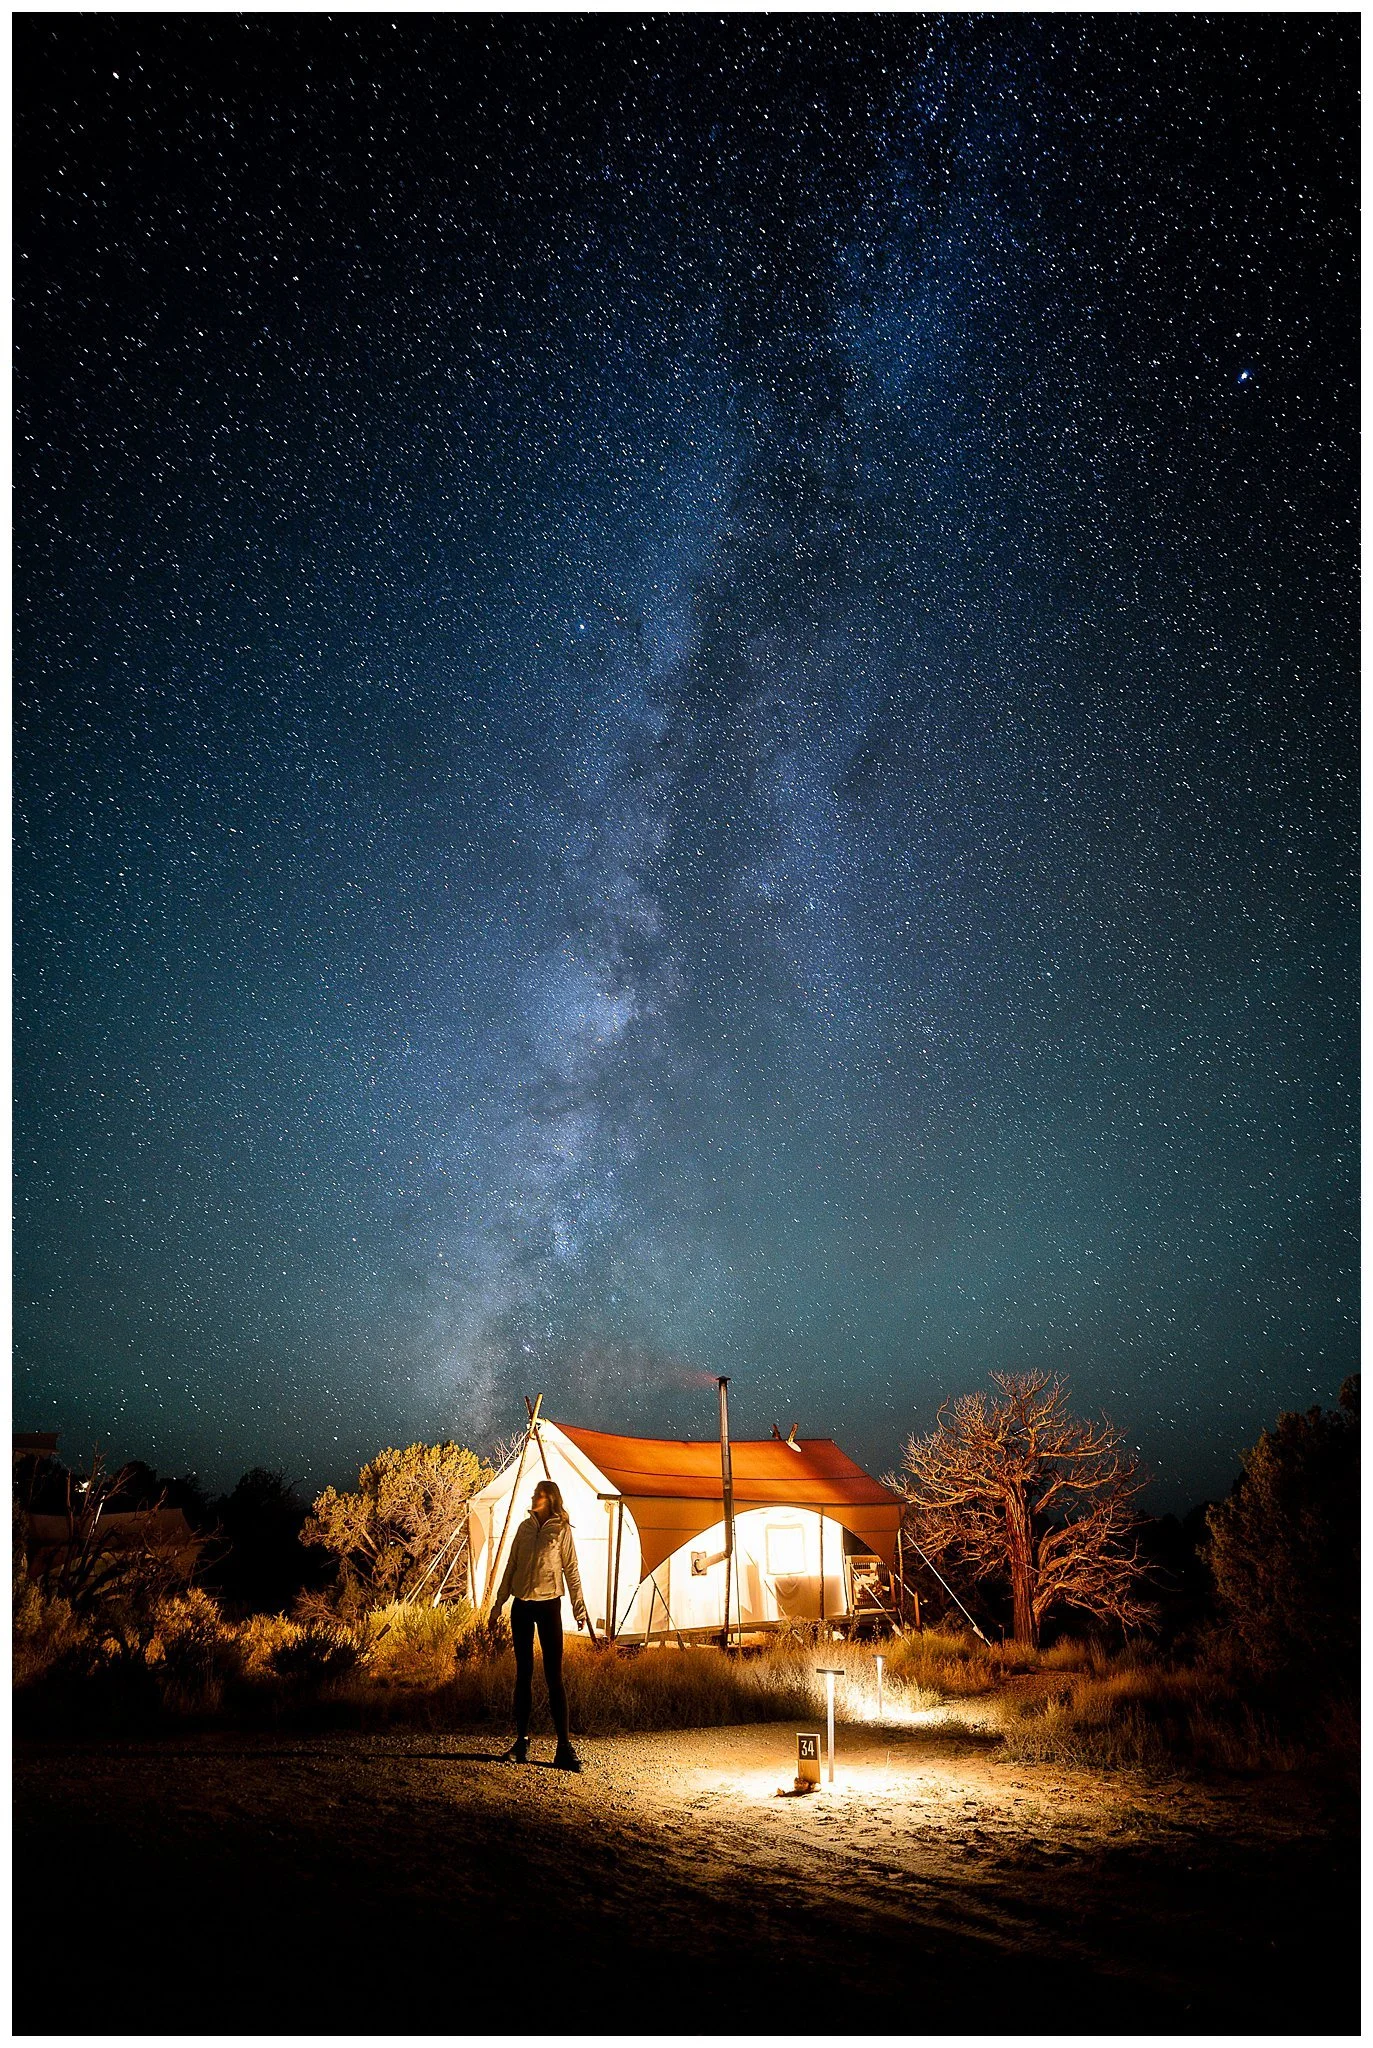
Photo by Esteban Gil